BABISH
recipes
community
cookware
cookbook
contact
JOIN
PIES
cook:
1 h 30 min

4,823,136 views I've made pies on the show before, but it's about time that I talk about the basics of making a really good pie - whether it's blueberry, apple, or pumpkin.
4 Servings
US
original
metric
INGREDIENTS
DIRECTIONS
Crusts
INGREDIENTS

For the Standard Pie Crust
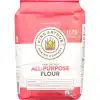
6 oz all purpose flour

1 tsp kosher salt

113 g or 1 stick unsalted butter, frozen

16 tbsp ice water

For the Double Pie Crust

10 oz all purpose flour

1 tsp kosher salt

230 g or 2 sticks unsalted butter, frozen

16 tbsp ice water

1 beaten egg white

granulated sugar

For the Lattice Pie Crust

10 oz all purpose flour

1 tsp kosher salt

230 g or 2 sticks unsalted butter, frozen

16 tbsp ice water

1 beaten egg white

granulated sugar
TOOLS
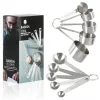
measuring cups and spoons set

food processor with blade and grating attachment

mixing bowls

mini prep bowls

plastic wrap

fridge
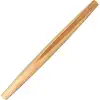
rolling pin
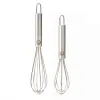
whisk
flat surface

pie plate

aluminum foil
dry rice or beans (for weight)

oven

fork
paring knife

pastry brush
DIRECTIONS
1.
For the Standard Pie Crust
1.
Combine all-purpose flour with kosher salt in a food processor. Using the blade attachment, pulse to combine.

6 oz all purpose flour

1 tsp kosher salt

food processor with blade and grating attachment

measuring cups and spoons set
2.
Using the grating attachment and allowing it to spin, press thoroughly frozen unsalted butter through the feed tube and into the flour mixture. Transfer the mixture to a bowl. Toss to ensure butter is fully covered with the flour mixture.

113 g or 1 stick unsalted butter, frozen

food processor with blade and grating attachment
3.
Slowly begin to add 1 tablespoon of ice water at a time to the mixture. The amount will depend on many different factors, so continue adding the ice water slowly and mixing the dough together until it just starts to hold its shape. It took about 15 tablespoons for me.

16 tbsp ice water

food processor with blade and grating attachment

measuring cups and spoons set
4.
Turn the dough out onto a flat, floured work surface and gently knead it into one cohesive mass. Don’t worry if the dough looks a little dry and crumbly because it will continue to hydrate once it is placed in the fridge.

For the Standard Pie Crust
flat surface
5.
Wrap the dough in plastic wrap and pat it out into a thick round disc so that the dough is easier to roll out later. Place the dough into the fridge and let sit for at least 30 minutes.

For the Standard Pie Crust

plastic wrap

fridge
6.
After 30 minutes has passed, the dough should be nice and firm and should look like it has hydrated nicely. In addition, it should be visibly dappled with little bits of butter. Take half of the dough, wrap with plastic, and place it back into the fridge for later.

For the Standard Pie Crust

plastic wrap

fridge
7.
On a flat work surface that is covered with flour, and adding flour as needed, roll the dough out to a diameter that is 1 to 2 inches wider than the pie plate you intend to use.

For the Standard Pie Crust
flat surface

rolling pin

pie plate
8.
Once the dough is rolled out to your desired specifications, use your rolling pin to lift it up over the countertop and transfer it over to your pie plate.

For the Standard Pie Crust

pie plate

rolling pin
9.
Instead of pressing the pie dough into the corners, lift and drop it into the corners to avoid stretching the pie dough. Make sure that the dough is generously hanging over the sides of the plate. Trim off any excess dough on the edge of the pie plate and wrap up the excess dough for later.

For the Standard Pie Crust

pie plate

paring knife
10.
“Flute” the edge of the pie crust by placing your finger and thumb on the crust and pressing the dough up between them, repeating around the circumference of the crust until you have achieved a pattern. Let sit in the fridge for at least 30 minutes.

For the Standard Pie Crust

fridge
11.
Once 30 minutes has passed, line the pie dough with aluminum foil and fill it with the pie weight of your choice, such as rice or dry beans. Place in a 400°F oven for 12 to 15 minutes until lightly brown. Remove the foil and “dock” the crust by poking several little holes in the bottom of the crust using a fork. Place back into the oven for another 7 to 9 minutes until a little more golden brown.

For the Standard Pie Crust

aluminum foil

dry rice or beans (for weight)

oven

fork
12.
For the Double Pie Crust
1.
Combine all-purpose flour with kosher salt and dump it into a food processor using the blade attachment. Pulse a few times to combine.

10 oz all purpose flour

1 tsp kosher salt

food processor with blade and grating attachment

measuring cups and spoons set
2.
Using the grating attachment and allowing it to spin, press thoroughly frozen unsalted butter through the feed tube and into the flour mixture. Remove from the processor and add mixture to a bowl. Toss to make sure that all of the butter is coated in flour.

230 g or 2 sticks unsalted butter, frozen

food processor with blade and grating attachment
3.
Slowly begin to add 1 tablespoon of ice water at a time to the mixture. The amount will depend on many different factors, so continue adding the ice water slowly and mixing the dough together until it just starts to hold its shape. It took about 16 tablespoons for me.

16 tbsp ice water

measuring cups and spoons set

food processor with blade and grating attachment
4.
Turn the dough out onto a flat work surface and gently knead it into one cohesive mass. Don’t worry if the dough looks a little dry and crumbly because it will continue to hydrate once it is placed in the fridge. Take a knife and divide the dough into two slices.

For the Double Pie Crust
flat surface

paring knife
5.
Wrap the dough in plastic and pat it out into a thick round disc so that the dough is easier to roll out later. Place the dough into the fridge and let sit for at least 30 minutes.

For the Double Pie Crust

plastic wrap

fridge
6.
After 30 minutes has passed, the dough should be nice and firm and should look like it has hydrated nicely. In addition, it should be visibly dappled with little bits of butter. Take half of the dough, wrap with plastic, and place it back into the fridge for later.

For the Double Pie Crust

plastic wrap

fridge
7.
On a flat work surface that is covered with flour, and adding flour as needed, roll the dough out to a diameter that is one to two inches wider than the pie plate you intend to use.

For the Double Pie Crust
flat surface

rolling pin

pie plate
8.
Once the dough is rolled out to your desired specifications, use your rolling pin to lift it up over the countertop and transfer it over to your pie plate.

For the Double Pie Crust

rolling pin

pie plate
9.
Instead of pressing the pie dough into the corners, lift and drop it into the corners to avoid stretching the pie dough. Make sure that the dough is generously hanging over the sides of the plate. Place it into the fridge and let sit for 30 minutes.

For the Double Pie Crust

pie plate

fridge
10.
Once 30 minutes has passed, line the pie dough with aluminum foil and fill it with the pie weight of your choice, such as rice. Place in a 400 degree Fahrenheit oven for 12 to 15 minutes until lightly brown. Remove the foil and “dock” the crust by poking several little holes in the bottom of the crust using a fork. Place back into the oven for another 7 to 9 minutes until a little more golden brown.

For the Double Pie Crust

aluminum foil

dry rice or beans (for weight)

oven

fork
11.
After the crust is removed from the oven, let it cool for a few minutes before using a fork to poke and deflate any puff ups. Trim off the excess pie dough around the circumference.

fork

paring knife

pie plate
12.
To make the additional layer of crust, roll out the other half of your dough to the same thinness and cover the filling making sure that it is evenly distributed. Trim off any excess dough and tuck it in gently underneath the par baked crust.

For the Double Pie Crust

rolling pin

paring knife

pie plate
13.
Cut a couple of vents in the top of the dough and brush the entire thing down with a beaten egg white and sprinkle with a few pinches of granulated sugar.

For the Double Pie Crust

1 beaten egg white

granulated sugar

paring knife

mini prep bowls

pastry brush
14.
Place into a 425°F oven for 35 to 50 minutes. Let it cool for at least 4 hours.

oven
15.
For the Lattice Pie Crust
1.
Combine all-purpose flour with kosher salt and dump it into a food processor using the blade attachment. Pulse a few times to combine.

10 oz all purpose flour

1 tsp kosher salt

food processor with blade and grating attachment
2.
Using the grating attachment and allowing it to spin, press thoroughly frozen unsalted butter through the feed tube and into the flour mixture. transfer to a mixing bowl. Toss to make sure that all of the butter is coated in flour.

230 g or 2 sticks unsalted butter, frozen

food processor with blade and grating attachment

mixing bowls
3.
Slowly begin to add ice water at a time to the mixture. The amount will depend on many different factors, so continue adding the ice water slowly and mixing the dough together until it just starts to hold its shape.

16 tbsp ice water

mixing bowls
4.
Turn the dough out onto a flat work surface and gently knead it into one cohesive mass. Don’t worry if the dough looks a little dry and crumbly because it will continue to hydrate once it is placed in the fridge.

For the Lattice Pie Crust
flat surface
5.
Wrap the dough in plastic and pat it out into a thick round disc so that the dough is easier to roll out later. Place the dough into the fridge and let sit for at least 30 minutes.

For the Lattice Pie Crust

plastic wrap

fridge
6.
After 30 minutes has passed, the dough should be nice and firm and should look like it has hydrated nicely. In addition, it should be visibly dappled with little bits of butter. Take half of the dough, wrap with plastic, and place it back into the fridge for later.

For the Lattice Pie Crust

plastic wrap

fridge
7.
On a flat work surface that is covered with flour, and adding flour as needed, roll the dough out into a large rectangle and cut into 10 equally sized strips and add it to an additional pie crust that has been refrigerated and not baked just yet.

For the Lattice Pie Crust
flat surface

rolling pin

paring knife
8.
Add your mixture to the crust and then lay 5 of your strips evenly and parallel to one another across the top of the pie. 1 in the center, 2 each to the right, and 2 each to the left.

For the Lattice Pie Crust

pie plate
9.
Lift up 2 of the strips and snake another strip underneath them perpendicular. Then, lay those 2 strips back down on top of the new strip and repeat the process with the 3 strips that you didn’t pull back during the last round.

For the Lattice Pie Crust

pie plate
10.
Trim the edges, tuck them underneath the bottom crust nice and tight, and brush the surface down with beaten egg white and a few sprinkles of granulated sugar. Place in a 400°F oven for 30 to 45 minutes until deeply golden brown. Let cool completely before digging in.

1 beaten egg white

granulated sugar

paring knife

pastry brush
Apple Pie
INGREDIENTS

3 pounds Honey Crisp or Granny Smith apples

Lemon juice
¾ cup sugar

2 ½ tbsp all purpose flour

Lemon zest

Kosher salt

½ tsp freshly grated nutmeg
½ tsp ground ginger

1 tsp cinnamon

Allspice

cloves, ground
TOOLS
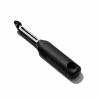
peeler
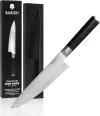
apple slicer and Chef’s knife

mixing bowls

measuring cups and spoons set

grater
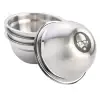
mini prep bowls

pie crust

aluminum foil

oven

whisk
DIRECTIONS
1.
Start out by following the instructions above for the double homemade pie crust.
2.
Peel your apples and cut the apple flesh off of the core and slice into half-inch pieces. Then, place the apples into a large bowl and toss them with a little squeeze of lemon juice to prevent the apples from turning brown.

3 pounds Honey Crisp or Granny Smith apples

Lemon juice

peeler

apple slicer and Chef’s knife

mixing bowls
3.
In a bowl, combine sugar, all-purpose flour, lemon zest, a pinch of kosher salt, freshly grated nutmeg, ground ginger, cinnamon, and a little sprinkling of both allspice and ground cloves.

¾ cup sugar

2 ½ tbsp all purpose flour

Lemon zest

Kosher salt

½ tsp freshly grated nutmeg

½ tsp ground ginger

1 tsp cinnamon

Allspice

cloves, ground

measuring cups and spoons set

mini prep bowls

whisk
4.
Use a tiny whisk and whisk together separately from the apples before pouring the mixture on top of the apples and tossing. Make sure that all of the apples are evenly coated in the mixture. Fill the pre-made pie crust (instructions above) with the apple filling.

3 pounds Honey Crisp or Granny Smith apples

whisk

mixing bowls
5.
For a double-crusted apple pie, follow steps 5 through 15 under the pie crust recipe listed above.
Pumpkin Pie
INGREDIENTS

½ cup granulated sugar

½ cup light brown sugar

1 tbsp flour

½ tsp ground ginger

½ tsp ground allspice

½ tsp freshly grated nutmeg

1 tsp cinnamon

1 (15 oz) can pumpkin puree

3 eggs

1 cup heavy whipping cream

cloves

Kosher salt

Freshly ground pepper

Maple syrup

Whipped cream
TOOLS

mixing bowls

measuring cups and spoons set

grater

mini prep bowls

pie crust

aluminum foil

oven

whisk
DIRECTIONS
1.
In a large bowl, combine granulated sugar, light brown sugar, flour, a pinch of kosher salt, ground ginger, ground allspice, freshly grated nutmeg, a little sprinkling of cloves, cinnamon, and a few twists of freshly ground pepper.

½ cup granulated sugar

½ cup light brown sugar

1 tbsp flour

Kosher salt

½ tsp ground ginger

½ tsp ground allspice

½ tsp freshly grated nutmeg

cloves

1 tsp cinnamon

Freshly ground pepper

mixing bowls
2.
In a separate bowl, whisk together canned pumpkin puree to the mix along with eggs and heavy whipping cream.

1 can (15 oz) can pumpkin puree

3 eggs

1 cup heavy whipping cream

mini prep bowls

whisk
3.
Next, add your premade pumpkin pie spice and mix together. For taste, add a little glug of maple syrup.

Maple syrup

mixing bowls
4.
Pour the mixture into the standard pie crust and place into a 400°F oven for 45 to 55 minutes. To prevent burning, take the pie out of the oven after 25 minutes and wrap the edges of the crust in a thin strip of aluminum foil.

pie crust

oven

aluminum foil
5.
Another 20 minutes later, the pie should be perfectly brown. To prevent the pie from cracking, take the pie out of the oven when the filling is only set around the outside two inches. The center should still be wobbly. Let it cool before digging in. Add a little bit of whipped cream to the top of the pie and enjoy.

Whipped cream
Blueberry Pie
INGREDIENTS

48 oz fresh or frozen blueberries

½ cup sugar
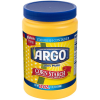
¼ cup corn starch

lemon zest
TOOLS

mixing bowls

measuring cups and spoons set

grater

mini prep bowls

pie crust

aluminum foil

oven

whisk
DIRECTIONS
1.
In a small bowl, whisk together sugar, corn starch, and lemon zest. Combine this mixture with the bowl of blueberries and toss accordingly.

½ cup sugar

¼ cup corn starch

lemon zest

48 oz fresh or frozen blueberries

mini prep bowls

whisk

mixing bowls
2.
Add the blueberry mixture to your standard pie crust.

48 oz fresh or frozen blueberries

½ cup sugar

¼ cup corn starch

lemon zest

pie crust
3.
Follow the steps for the lattice pie crust above.

pie crust
4.
Bake at 400°F for 30 to 45 minutes until deeply golden brown. Allow to cool for at least four hours before digging in.

oven
Unlock this recipe

Welcome to the...
Babish Culinary Universe
Get instant access to hundreds of written recipes, connect with a community eager to share their cooking triumphs and mishaps, and find inspiration for your next meal.
Try it out for a month free, then just $10/year
RELATED RECIPES